인간의 능력을 가진 로봇과 실시간으로 대화할 수 있기를 원했던 적이 있습니까? 글쎄, 이것은 너무 미친 것이 아니라 2023년에 생각하십시오
사실 그것은 매우 쉽습니다, 당신이 정말로 필요로하는 것은 다음과 같습니다 :
- 디스코드 봇 (Discord.js)
- 챗GPT API
- Text-to-speech 및 Speech-to-text API(Google 클라우드)
- 그리고 시간 🤠
다음은 어떻게 생겼는지에 대한 예입니다. 이 작은 프로젝트에 대해 알아야 할 것은 몇 가지 기본적인 JavaScript입니다.
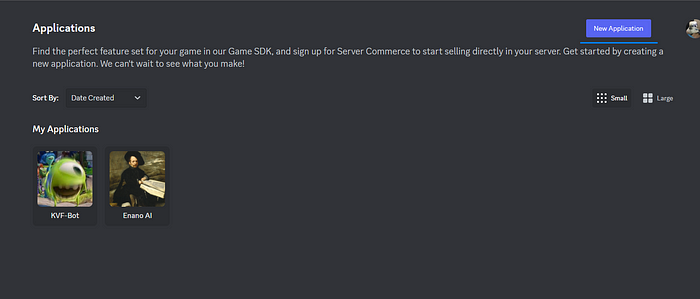
1단계: 봇 만들기
먼저 디스코드 봇을 만들고 디스코드 개발자로 이동하여 새 애플리케이션을 클릭하고 원하는 이름을 지정해야 합니다.
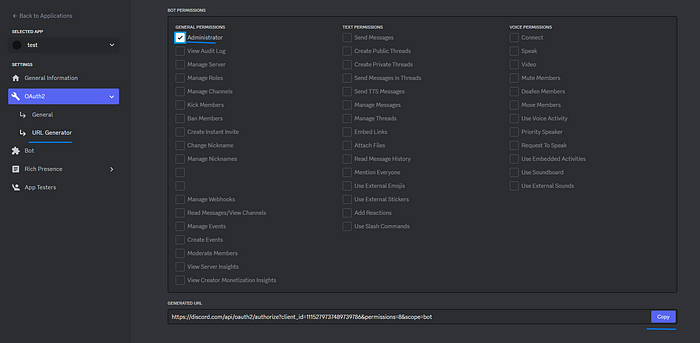
그런 다음 OAuth2 및 URL 생성기로 이동하여 범위에 대해 봇을 클릭하고 봇 권한에 대해 관리자를 클릭 한 다음 생성 된 링크를 클릭하면 서버에 있어야합니다.
그런 다음 봇으로 이동하여 토큰 재설정을 클릭하여 봇 토큰을 가져오고 이러한 의도를 수락합니다(일반 권한용).

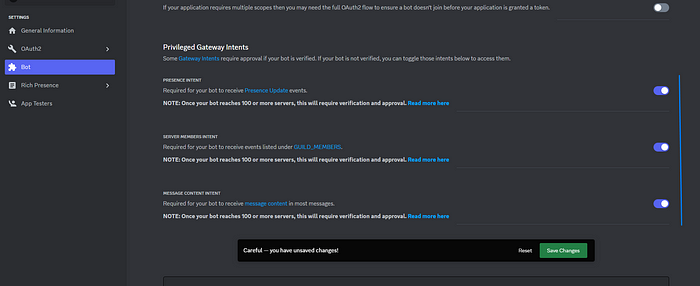
물론 이 토큰을 누구에게도 제공하지 않으면 사람들이 봇에 액세스할 수 있습니다.
2단계: 프로젝트 생성
이제 프로젝트를 만들고 폴더를 만들고 파일을 추가하고 다음을 추가합니다..envDISCORD_TOKEN = YOUR_TOKEN
DISCORD_TOKEN=YOUR_SUPER_SECRET_TOKEN완료되면 with를 만들고 ES6 가져 오기를 추가하십시오.package.jsonnpm init -y”type”: “module”
{
  "name": "discord-tts",
  "version": "1.0.0",
  "description": "",
  "main": "index.js",
  "type": "module", // Here
  "scripts": {
    "start": "node ./index.js" // Add this for npm start
  },
  "keywords": [],
  "author": "",
  "license": "ISC"
}
다음 패키지가 필요합니다.npm i
npm i @discordjs/opus
npm i @discordjs/voice
npm i @google-cloud/speech
npm i @google-cloud/text-to-speech
npm i dotenv
npm i discord.js
npm i ffmpeg-static
npm i libsodium-wrappers
인덱스에서 이 코드를 추가.js 봇을 시작하기에 충분합니다.
import { Client, GatewayIntentBits, Events } from 'discord.js';
// import { registerCommands, loadCommands} from './commands.js'
import dotenv from 'dotenv';
const client = new Client({
intents: [
GatewayIntentBits.Guilds, // These are the permissions the bot has
GatewayIntentBits.GuildMembers,
GatewayIntentBits.GuildMessages,
GatewayIntentBits.MessageContent,
GatewayIntentBits.GuildVoiceStates,
],
});
// registerCommands(); // Register all commands
// client.on(Events.InteractionCreate, async (interaction) => {
// loadCommands(interaction)
// });
// Login bot
dotenv.config();
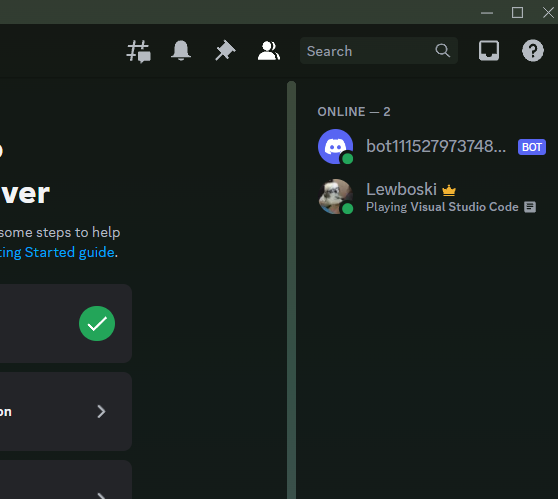
client.login(process.env.DISCORD_TOKEN);이제 시도할 수 있으며 봇이 살아 있다는 🤯 징후를 보여야 합니다npm start
3단계: Google Cloud 및 ChatGPT 계정 만들기
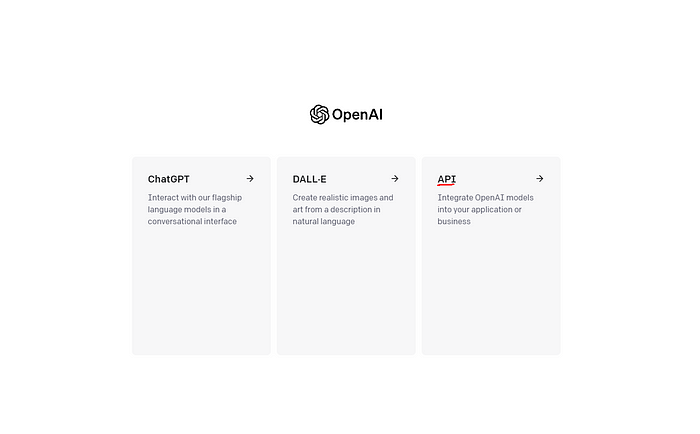
이 단계는 매우 간단합니다, 여기로 이동하여 로그인 / 가입을 누르고 로그인하면이 세 가지 중에서 선택할 수 있습니다, API를 선택하십시오
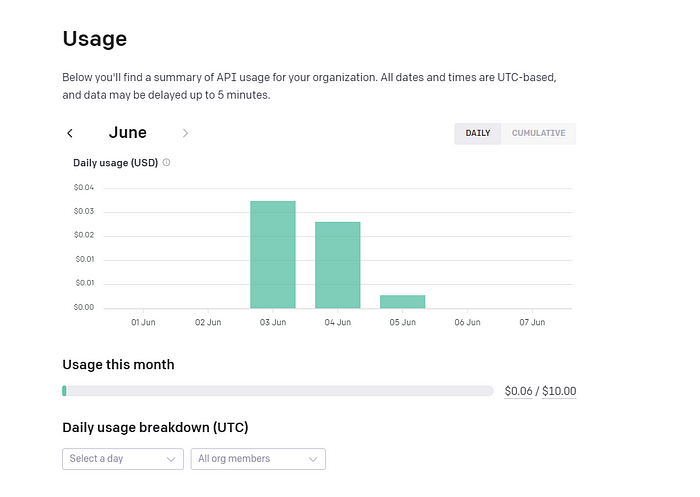
리디렉션되지 않은 경우 API의 링크입니다., 다음으로 신용 카드를 추가해야합니다., 이것은 당신에게 10 달러 상당의 요청을 부여하지만, 걱정하지 마세요 나는 0 달러를했고 방금 06.<> 달러에 도달했습니다.
API 키로 이동하여 새 키를 만듭니다.
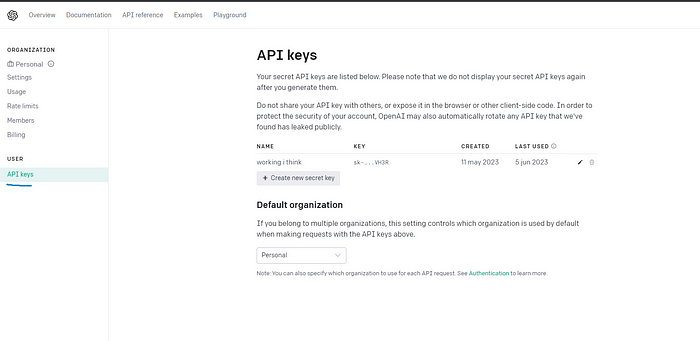
이전과 동일한 단계에서 .env에 다음과 같이 추가하십시오.OPENAI_TOKEN
DISCORD_TOKEN = SECRET_TOKEN
OPENAI_TOKEN = SECRET_TOKEN
다음으로 Speech-to-text 및 Text-to-speech에 대한 Google Cloud 계정을 만들 예정이며 기술적으로는 OpenAI로도 이 작업을 수행할 수 있지만 적어도 현재로서는 Google Speech-to-text 방식이 더 정확하다는 것을 알았습니다.
아직 계정이 없는 경우 먼저 Google 계정을 만들고 여기로 이동하여 프로젝트 만들기를 클릭합니다.
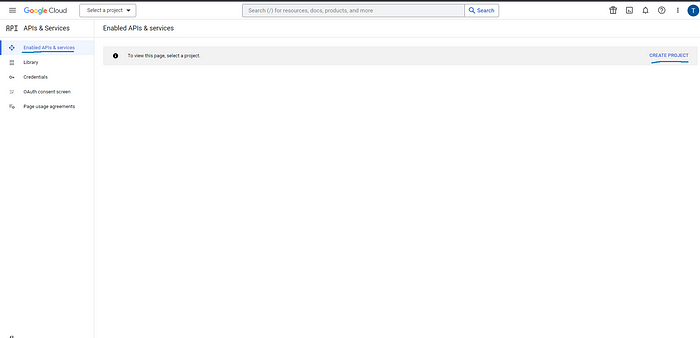
그것을 선택한 다음 라이브러리를 클릭하십시오 (미안하지만 스페인어로 되어 있지만 동일하게 보일 것입니다).
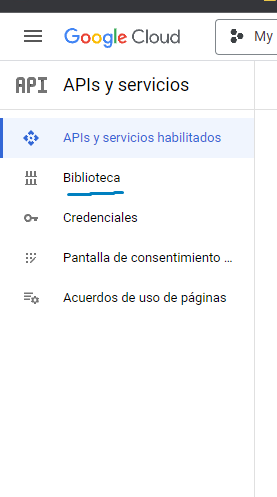
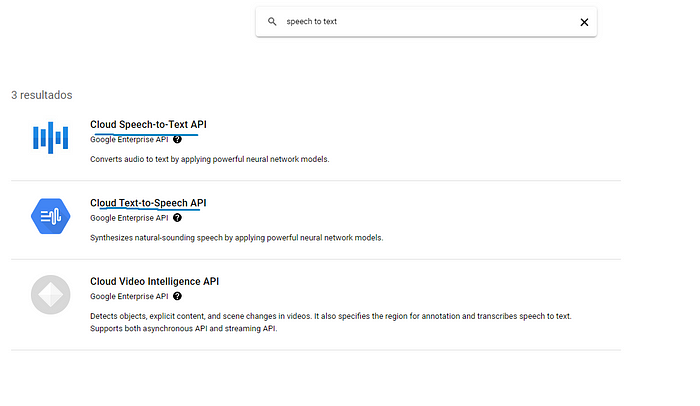
그런 다음 Speech-to-text를 검색하고 다음 두 가지를 선택한 다음 활성화를 클릭합니다.
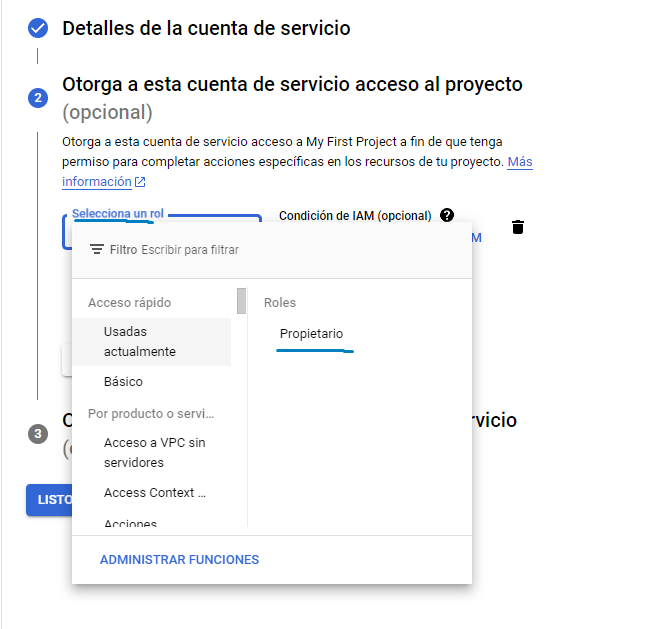
완료되면 이전과 동일한 페이지에서 이번에는 자격 증명으로 이동하여 자격 증명 및 서비스 계정 만들기를 누릅니다.
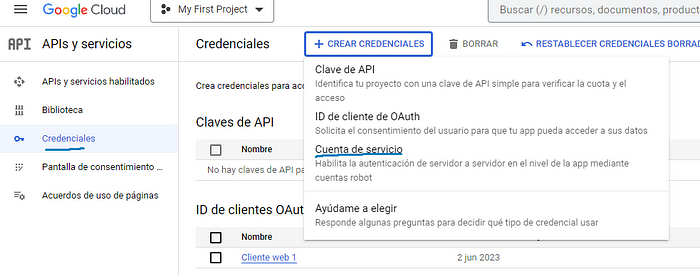
그런 다음 요청하는 내용을 채우고 2단계에서 역할을 선택할 때 소유자를 클릭하는 것이 중요합니다.
그런 다음 새로 만든 계정을 클릭합니다.

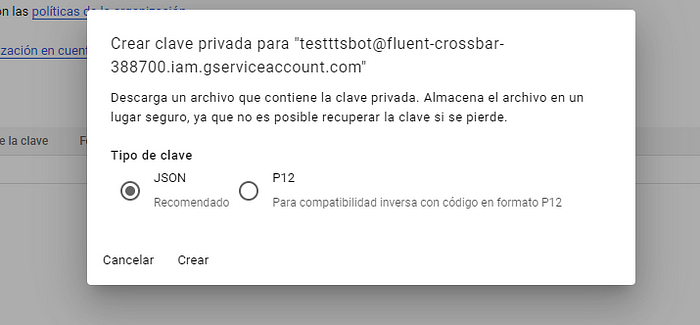
키로 이동한 다음 키 추가 및 새 키 만들기로 이동합니다.
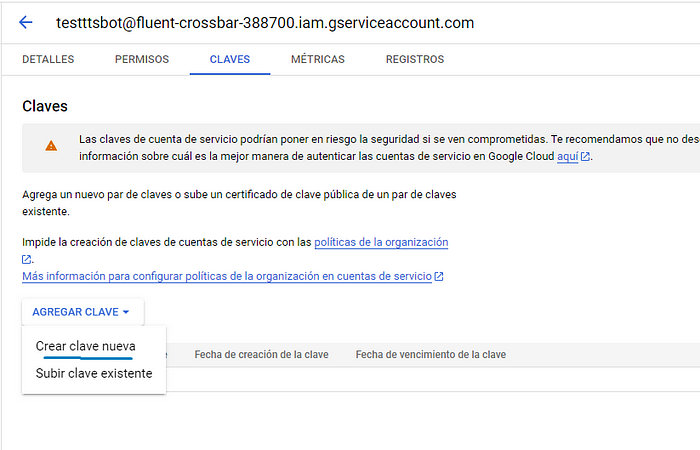
JSON을 클릭하고 :D 만듭니다.
프로젝트에 JSON 파일을 추가하고 다음과 같이 이름을 바꿉니다.serviceaccount.json
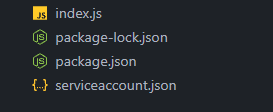
그리고 파일에 JSON 파일의 경로를 추가하면 내 파일이 루트 디렉토리에 있으므로 다음과 같습니다..env./serviceaccount.jsonserviceaccount.json
DISCORD_TOKEN = SECRET_TOKEN
OPENAI_TOKEN = SECRET_TOKEN
GOOGLE_APPLICATION_CREDENTIALS="serviceaccount.json"
4단계: 명령 만들기
마지막으로 이제 남은 것은 프로그래밍하고 모든 코드의 주석 처리를 제거하고 라는 파일을 만드는 것이지만 터치하기 전에 디스코드 봇을 클릭하고 다음을 클릭해야 합니다.commands.js.envCopy User ID
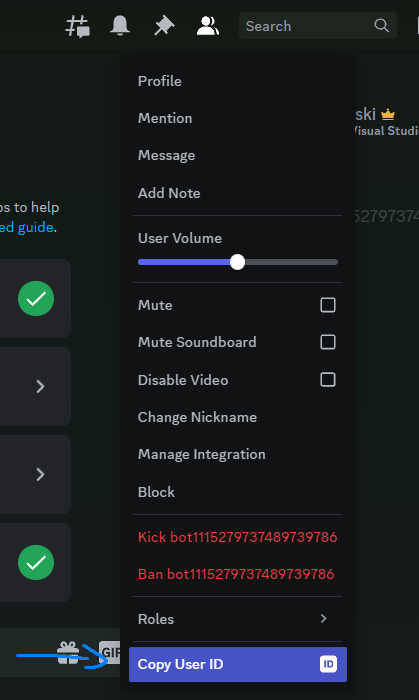
그리고 지금 당신은 이것을 가져야합니다 :CLIENT_ID.env
DISCORD_TOKEN = YOUR_SUPER_SECRET_TOKEN
CLIENT_ID = 1115279737489739786
OPENAI_TOKEN = SECRET_TOKEN
GOOGLE_APPLICATION_CREDENTIALS="serviceaccount.json"
이제 우리는 이것을 우리의 :commands.js
import { Collection, REST, Routes } from "discord.js";
import { fileURLToPath } from 'url';
import { dirname, join } from 'path';
import dotenv from 'dotenv';
import fs from "fs";

dotenv.config();
const commands = new Collection();
export async function loadCommands(interaction) {
  if (!interaction.isChatInputCommand()) return;

  const command = commands.get(interaction.commandName);
  if (!command) return console.log(`No ${interaction.commandName}`);

  try {
    await command.execute(interaction);
  } catch (error) {
    console.log(error);
  }
}

export async function registerCommands() {
  const commandsArr = [];

  const __filename = fileURLToPath(import.meta.url);
  const __dirname = dirname(__filename);

  const commandsPath = join(__dirname, "commands");
  const categoriesFolders = fs.readdirSync(commandsPath);

  for (const categoryFolders of categoriesFolders) {
    const commandsFolderPath = join(commandsPath, categoryFolders);
    const commandsFolders = fs.readdirSync(commandsFolderPath);

    for (const commandFolder of commandsFolders) {
      const commandPath = join(commandsPath, categoryFolders, commandFolder, 'index.js');
      const command = await import(commandPath);

      if ("data" in command && "execute" in command) {
        commands.set(command.data.name, command);
        commandsArr.push(command.data.toJSON());
        console.log(`Command at ${commandPath} - ✅`);
      } else {
        console.log(`Command at ${commandPath} - ❌`);
      }
    }
  }
  refreshCommands(commandsArr)
}

function refreshCommands(commands) {
  const rest = new REST().setToken(process.env.DISCORD_TOKEN);
  return rest.put(Routes.applicationCommands(process.env.CLIENT_ID), {
    body: commands,
  })
}
현재로서는 유일하게 중요한 기능인 register 는 다음 폴더를 통과하고 폴더의 각 범주를 통과하며 그 안의 각 항목을 실행하므로 새 명령을 추가 할 때마다 트리는 다음과 같이 보일 것입니다.registerCommandsrefreshCommandscommandsindex.js
├── commands
│   ├── fun
│   │   ├── annoy
│   │   │   └── index.js
│   │   └── laugh
│   │       └── index.js
│   └── voice-chat
│       ├── join
│       │   ├── index.js
│       │   └── utils.js
│       └── leave
│           └── index.js
├── commands.js
├── index.js
├── package-lock.json
└── package.json
나는 당신의 상상력에 재미있는 카테고리를 맡길 것입니다, 우리는 이번에 카테고리에 초점을 맞출 것입니다, 당신이 볼 수 있듯이 우리는 코드를 깨끗하고 확장 가능하게 유지하는 데 매우 유용한 폴더 안에 utils 파일을 읽을 수 없습니다.voice-chat
따라서 폴더와 해당 파일 및 폴더를 만듭니다.commands
├── commands
│   └── voicechat
│       └── join
│           ├── index.js
|           ├── talkToAI.js
│           └── utils.js
join 명령 폴더에서 다음을 :index.js
import { SlashCommandBuilder } from 'discord.js';
import { joinVoiceChannel } from '@discordjs/voice';

import { VoiceTranscriptor } from './utils.js';

export const data = new SlashCommandBuilder()
  .setName('join') // How the command will look
  .setDescription('Talk to AI');

export const execute = async (interaction) => {
  try {
    if (
      interaction.member == null ||
      interaction.member.voice?.channel == null
    ) {
      return interaction.reply('Get on the voicechat first'); // In case the bot is not inside the channel yet
    }

    const connection = joinVoiceChannel({
      channelId: interaction.member.voice.channelId,
      guildId: interaction.guildId,
      adapterCreator: interaction.guild?.voiceAdapterCreator,
    }); // Connect to VC

    connection.receiver.speaking.on('start', (userId) => {
      const voiceTrascriptor = new VoiceTranscriptor(connection);
      voiceTrascriptor.listen(userId);
    }); // When someone talks

    interaction.reply('Joining 🦎');
  } catch (error) {
    console.log(error);
  }
};
폴더와 명령의 이름을 설명과 동일하게 원하는 대로 바꿀 수 있으므로 and를 언어나 원하는 대로 변경할 수 있습니다.setNamesetDescription
다음으로 파일을 만들 예정이며, 여기에서 대부분의 호출 API가 발생합니다.utils.js
import pkg from '@discordjs/opus';
const { OpusEncoder } = pkg;

import {
  AudioPlayerStatus,
  EndBehaviorType,
  createAudioResource,
  createAudioPlayer,
} from '@discordjs/voice';
import { TextToSpeechClient } from '@google-cloud/text-to-speech';
import { SpeechClient } from '@google-cloud/speech';
import fs from 'fs';
import { dirname, join } from 'path';
import { fileURLToPath } from 'url';

import { talkToAI } from './talkToAI.js'

const REQUEST_CONFIG = {
  encoding: "LINEAR16",
  sampleRateHertz: 48000,
  languageCode: "en-US", // Change to the language you want
  audioChannelCount: 2,
};

export class VoiceTranscriptor {
  connection;
  receiver;
  speechClient = new SpeechClient();

  message;
  commandsChannel;

  time;
  messageId;
  constructor(connection) {
    this.connection = connection;
    this.receiver = this.connection.receiver;
  }

  async listen(userId) {
    try {
      console.log(`Listening to ${userId} 🦎`);
      this.dataSubscriptions(userId);
    } catch (error) {
      console.log(error);
    }
  }

  dataSubscriptions(userId) {
    let subscription = this.receiver.subscribe(userId, {
      end: {
        behavior: EndBehaviorType.AfterSilence,
        duration: 100,
      },
    });

    const buffers = [];
    const encoder = new OpusEncoder(48000, 2);

    subscription.on('data', (chunk) => {
      console.log(buffers.length)
      buffers.push(encoder.decode(chunk));
    }); // Subscription on when we receive data

    subscription.once('end', async () => {
      if (buffers.length < 70) {
        return console.log('Audio is too short')
      }
      this.time = performance.now();

      const outputPath = this.getOutputPath(buffers);
      const transcription = await this.getTranscription(outputPath);
      console.log(transcription);

      if (transcription.length > 5) return this.AISpeech(transcription); // The transcription has a minimum of 5 letters
    }); // Subscription on when user stops talking
  }

  async getTranscription(tempFileName) {
    try {
      const bytes = fs.readFileSync(tempFileName).toString('base64');
      const request = {
        audio: {
          content: bytes,
        },
        config: REQUEST_CONFIG,
      };

      const [response] = await this.speechClient.recognize(request);
      if (response && response.results) {
        const transcription = response.results
          .map((result) => {
            if (result.alternatives) return result.alternatives[0].transcript;
            else {
              console.log(result);
              throw Error('No alternatives');
            }
          })
          .join('\n');

        return transcription.toLowerCase();
      } else {
        console.log(response);
        throw Error('No response or response results');
      }
    } catch (error) {
      console.log(error);
    }
  }

  async AISpeech(transcription) {
    try {
      // Call ChatGPT API
      const text = await talkToAI(transcription);
      const textToSpeech = new TextToSpeechClient();
      const request = {
        input: { text },
        voice: {
          languageCode: 'en-US', // Change it to the language you want
          ssmlGender: 'NEUTRAL', // Gender
        },
        audioConfig: { audioEncoding: 'MP3' },
      };

      const [response] = await textToSpeech.synthesizeSpeech(request);

      fs.writeFileSync('./assets/output.mp3', response.audioContent, 'binary');

      const __filename = fileURLToPath(import.meta.url);
      const __dirname = dirname(__filename);

      const resource = createAudioResource(
        join(__dirname, '../../../assets/output.mp3')
      );

      const player = createAudioPlayer();

      this.playerSubcription(player);

      const delay = performance.now() - (this.time || 0);
      const delaySeconds = delay / 1000;
      const delayRounded = delaySeconds.toFixed(2);
      console.log(`This took ${delayRounded}s 👺⌚`)

      // Start speaking
      this.connection.subscribe(player);
      player.play(resource);
    } catch (err) {
      console.log(err);
    }
  }

  playerSubcription(player) {
    player.on('error', (error) => {
      console.log('Error:', error.message);
      this.connection.destroy();
    });

    player.on(AudioPlayerStatus.Idle, () => {
      player.removeAllListeners();
    });
  }

  getOutputPath(buffers) {
    const concatenatedBuffer = Buffer.concat(buffers);
    const outputPath = './assets/input.pcm';
    fs.writeFileSync(outputPath, concatenatedBuffer);
    return outputPath;
  }
}
마지막으로 파일을 만듭니다.talkToAI.js
const CHAT_GPT_API = "https://api.openai.com/v1/chat/completions";

const systemMessage =
  'You are a bot that answers questions about climate in different locations of the world, make up your own data, this is all fictional, so some locations might not exist'; // Give the bot whatever context you want
const conversationLog = [
  {
    role: 'system',
    content: systemMessage,
  },
];

export async function talkToAI(message) {
  try {
    conversationLog.push({
      role: 'user',
      content: message,
    });

    const response = await fetchChatGPT();
    conversationLog.push(response.message);

    return response.message.content;
  } catch (error) {
    console.log(error);
    return errorMessage();
  }
}

async function fetchChatGPT() {
  const data = {
    method: 'POST',
    headers: {
      Authorization: `Bearer ${process.env.OPENAI_TOKEN}`,
      'Content-Type': 'application/json',
    },
    body: JSON.stringify({
      model: 'gpt-3.5-turbo',
      messages: conversationLog,
      max_tokens: 100,
    }),
  };
  let response = await fetch(CHAT_GPT_API, data);
  response = await response.json();
  return response.choices[0];
}
시스템 메시지에서 원하는 것을 넣을 수 있으며 원하는 경우 제거 할 수 있습니다.console.log
모든 폴더를 만든 후 폴더 구조는 다음과 같아야 합니다.
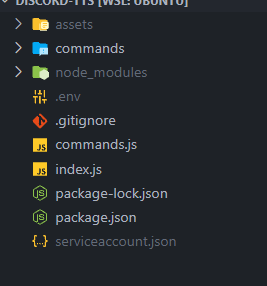
5단계: 즐기세요
그게 다야, 이제 시도하고 그것이 어떻게 작동하는지 볼 시간이다, 당신은 당신이 뭔가를 입력 할 때마다 그것은 당신을 위해 그것을 말한다 어쩌면 명령과 같은 다른 명령을 추가 할 수 있습니다. 내 개인 봇에서 이 모든 명령 등을 추가했는데, 다음은 다음과 같은 예입니다./leave/tts
'프로그래밍 > 자바스크립트' 카테고리의 다른 글
| 프로그래밍 「 자바스크립트 편」HTML 및 JavaScript를 사용한 간단한 카운트 다운 타이머 (0) | 2023.06.17 |
|---|---|
| 프로그래밍 「 자바스크립트 편」코드를 사용하여 HTML 및 CSS로 세련된 로그인 페이지 만들기 (0) | 2023.06.16 |
| 프로그래밍 「 자바스크립트 편」 IoT 시스템 개발이 왜 그렇게 어려워 보입니까? (0) | 2023.06.16 |
| 프로그래밍 「 자바스크립트 편」생계를 위한 프로그래밍은 너무 (매우) 외로울 수 있습니다 (0) | 2023.06.16 |
| 프로그래밍 「 자바스크립트 편」Mongoose에 대한 UUID 스키마 형식 (0) | 2023.06.16 |


