플레이어가 우리 게임에서 피해를 입힐 수 있는 유일한 존재라면 공정하지 않을 것입니다. 그것은 그들을 위협없이 압도적 인 깡패로 만들 것입니다. 그렇기 때문에 이 부분에서는 적에게 반격할 수 있는 능력을 부여하고 플레이어에게 실질적인 피해를 줄 수 있습니다! 이 과정은 플레이어에게 사격 및 피해 입히기 능력을 부여할 때 했던 것과 유사합니다. 이번에는 그 반대가 될 것입니다.
이 부분은 시간이 좀 걸릴 수 있으니 편하게 편하게 적군이 될 만한 존재로 만들자!
이 부분에서 배울 내용:
· AnimationPlayer 노드를 사용하는 방법
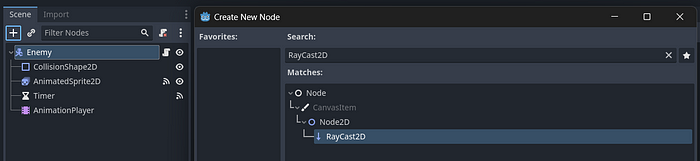
· RayCast2D 노드를 사용하는 방법입니다.
· 변조 값으로 작업하는 방법.
· 노드를 복사/붙여넣기하고 개체를 복제하는 방법
적 사격
이전에는 적 스크립트에서 아직 사용하지 않은 총알 및 공격 변수를 추가했습니다. 우리는 적을 통제하고 있지 않기 때문에 그들이 우리를 마주하고 있는지 여부를 결정할 방법이 필요합니다. RayCast2D 노드를 사용하여 적 주위에서 충돌하여 노드를 공격하는 광선 또는 선을 만들 수 있습니다. 이 광선 투진은 "플레이어"라고 불리는 플레이어의 충돌에 부딪히는지 확인하는 데 사용됩니다. 만약 그렇다면, 우리는 적들이 우리를 향하고 있다는 것을 의미하기 때문에 우리에게 총을 쏘도록 방아쇠를 당길 것입니다. 이렇게 하면 총알이 생성되어 플레이어에게 맞으면 피해를 입힐 수 있습니다.
이 노드를 적 씬 트리에 추가해 보겠습니다.
이제 광선이나 화살이 적에게서 오는 것을 볼 수 있습니다. 검사기 패널에서 이 광선의 길이를 변경할 수 있습니다. 지금은 50세에 남겨두겠습니다.
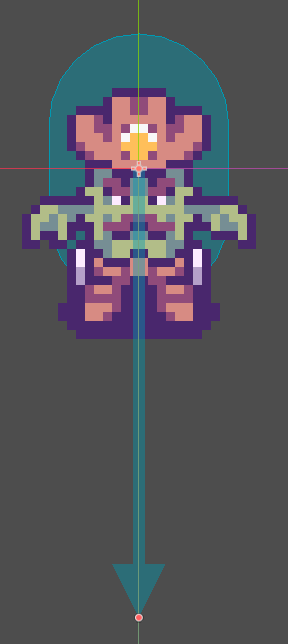
우리는 이 광선을 적이 향하고 있는 방향으로 움직이고 싶습니다. _physics_process() 함수에서 모든 이동 코드를 수행하므로 이 작업을 수행할 수 있습니다. 우리는 광선 캐스트를 적의 방향으로 돌리고 광선 캐스트 화살표 길이의 값(저에게는 50)을 곱합니다. 이것은 그들이 다른 충돌을 칠 수 있는 정도입니다.
### Enemy.gd
# older code
# Apply movement to the enemy
func _physics_process(delta):
var movement = speed * direction * delta
var collision = move_and_collide(movement)
#if the enemy collides with other objects, turn them around and re-randomize the timer countdown
if collision != null and collision.get_collider().name != "Player" and collision.get_collider().name != "EnemySpawner" and collision.get_collider().name != "Enemy":
#direction rotation
direction = direction.rotated(rng.randf_range(PI/4, PI/2))
#timer countdown random range
timer = rng.randf_range(2, 5)
enemy_animations(direction)
#if they collide with the player
#trigger the timer's timeout() so that they can chase/move towards our player
else:
timer = 0
#plays animations only if the enemy is not attacking
if !is_attacking:
enemy_animations(direction)
#resets our attacking state back to false
if $AnimatedSprite2D.animation == "spawn":
$Timer.start()
# Turn RayCast2D toward movement direction
if direction != Vector2.ZERO:
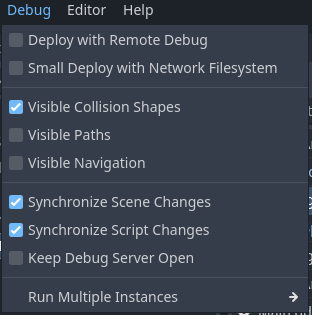
$RayCast2D.target_position = direction.normalized() * 50디버그 메뉴에서 충돌 가시성을 활성화하고 게임을 실행하면 적들이 향하는 방향의 충돌에 부딪히는 광선 투사로 뛰어다니는 것을 볼 수 있습니다.
이제 process() 함수를 변경하여 총알을 생성하고 적의 사격 애니메이션을 재생할 수 있습니다. 이 전체 프로세스는 시간 계산 없이 ui_attack 아래의 플레이어 코드와 유사합니다.
### Enemy.gd

# older code
func _process(delta):
    #regenerates our enemy's health
    health = min(health + health_regen * delta, max_health)
    #get the collider of the raycast ray
    var target = $RayCast2D.get_collider()
    if target != null:
        #if we are colliding with the player and the player isn't dead
        if target.name == "Player":
            #shooting anim
            is_attacking = true
            var animation  = "attack_" + returned_direction(new_direction)
            $AnimatedSprite2D.play(animation)
총알 생성
또한 func _on_animated_sprite _finished(): 함수에서 총알을 스폰하는데, 총알 애니메이션이 재생된 후에야 총알이 메인 씬에 추가되기를 원하기 때문입니다. 씬을 인스턴스화하기 전에 적을 위한 Bullet 씬을 만들어야 합니다. 이는 기존 Bullet 씬이 플레이어와의 충돌을 무시하도록 지시되기 때문에 기존 씬을 복제하고 적을 무시하도록 코드를 교체하는 것이 더 쉬울 것이기 때문입니다.
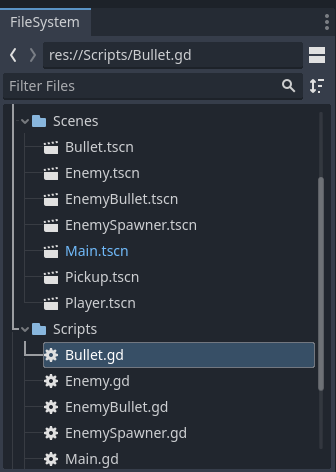
계속해서 Bullet 장면과 스크립트를 모두 복제하고 이름을 EnemyBullet.tscn 및 EnemyBullet.gd 로 바꿉니다.
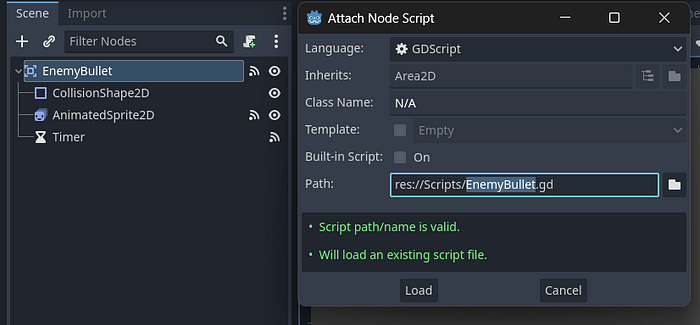
복제된 새 씬 루트의 이름을 EnemyBullet으로 바꾸고 EnemyBullet 스크립트를 첨부합니다.
EnemyBullet 스크립트에서 on_body_entered() 함수의 "Player" 및 "Enemy" 문자열을 바꿉니다.
### EnemyBullet.gd

# older code

#Collision detection for the bullet
func _on_body_entered(body):
    # Ignore collision with Enemy
    if body.name == "Enemy":
        return

    # Ignore collision with Water
    if body.name == "Map":
        #water == Layer 0
        if tilemap.get_layer_name(0):
            return

    # If the bullets hit an enemy, damage them
    if body.name.find("Player") >= 0:
        body.hit(damage)

    # Stop the movement and explode
    direction = Vector2.ZERO
    $AnimatedSprite2D.play("impact")
이제 Enemy 스크립트의 총알 및 공격 변수 아래에서 Bullet 장면 참조를 EnemyBullet 장면 참조로 바꿉니다.
### Enemy.gd

# older code

# Bullet & attack variables
var bullet_damage = 50
var bullet_reload_time = 1000
var bullet_fired_time = 0.5
var bullet_scene = preload("res://Scenes/EnemyBullet.tscn")
Enemy 씬으로 돌아가 func _on_animated_sprite_2d_animation_finished(): 함수에서 총알을 스폰할 수 없습니다. EnemyBullet 씬의 또 다른 인스턴스를 만들어서 데미지, 방향, 위치를 적이 탄환을 발사할 때 향하고 있던 방향과 적 앞 8픽셀 위치를 업데이트해야 합니다.
### Enemy.gd
# older code

#resets our attacking state back to false
func _on_animated_sprite_2d_animation_finished():
    #Once the death animation has played, we can remove the enemy from the scene tree
    if $AnimatedSprite2D.animation == "death":
        get_tree().queue_delete(self)

    is_attacking = false

    # Instantiate Bullet
    if $AnimatedSprite2D.animation.begins_with("attack_"):
        var bullet = bullet_scene.instantiate()
        bullet.damage = bullet_damage
        bullet.direction = new_direction.normalized()
        # Place it 8 pixels away in front of the enemy to simulate it coming from the guns barrel
        bullet.position = player.position + new_direction.normalized() * 8
        get_tree().root.get_node("Main").add_child(bullet)
데미지 플레이어
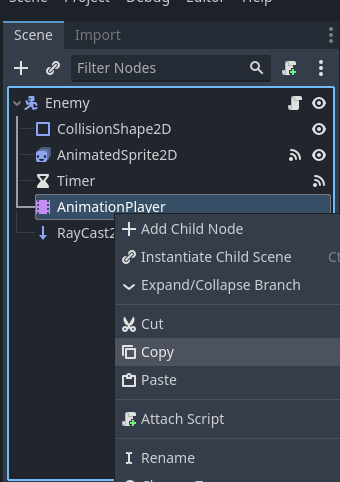
이제 EnemyBullet 스크립트의 body.hit(damage) 코드가 작동할 수 있도록 Player 스크립트에 damage 함수를 추가해야 합니다. 그 앞에서, 적에 추가한 데미지 애니메이션을 플레이어에 추가하겠습니다. AnimationPlayer 작업을 연습하고 싶다면 다시 만들 수 있지만, 여기서는 Enemy 씬에서 노드를 복사하여 Player 씬에 붙여넣기만 하면 됩니다.
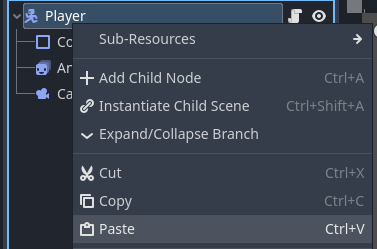
플레이어 씬에 이미 AnimatedSprite2D 노드가 있기 때문에, 애니메이션을 모듈레이트 값에 자동으로 연결합니다.
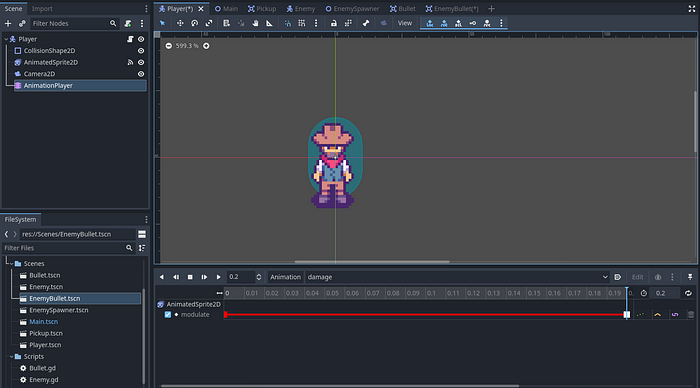
코드에서 피해 함수를 만들 수 있습니다. 이 기능은 총알에 맞아 피해를 입는 적 장면에서 만든 기능과 유사합니다. 빨간색 "피해" 표시기 애니메이션도 피해 시 재생되며 건강 값이 업데이트됩니다. 우리는 게임 오버 화면과 함께 다음 부분에서 구현하기를 원하기 때문에 이 부분에서 죽음 기능을 추가하지 않을 것입니다.
### Player.gd

# older code
#does damage to our player
func hit(damage):
    health -= damage
    health_updated.emit(health, max_health)
    if health > 0:
        #damage
        $AnimationPlayer.play("damage")
        health_updated.emit(health)
    else:
        #death
        set_process(false)
        #todo: game over
최종 코드는 다음과 같아야 합니다.
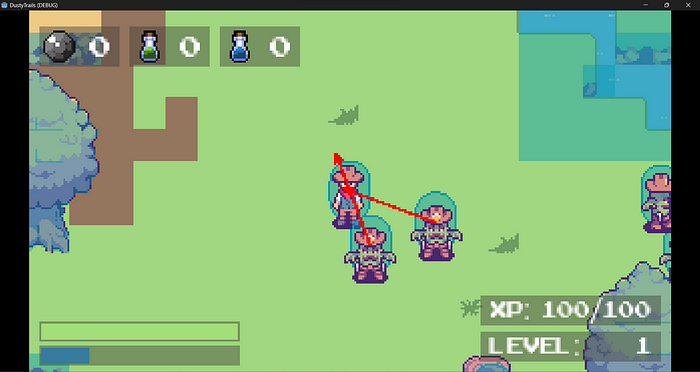
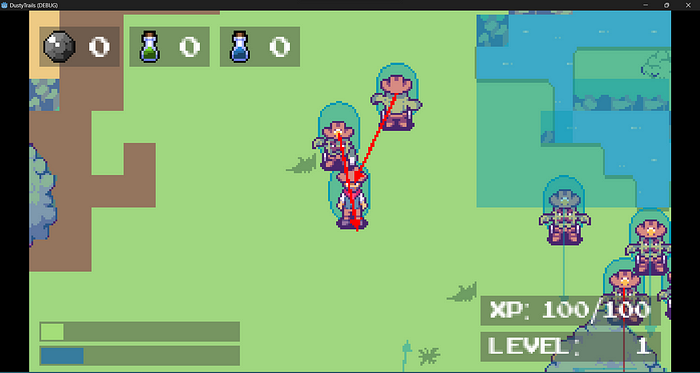
이제 장면을 실행하면 적이 당신을 쫓아가서 총을 쏘아야 하고, 총알이 플레이어 노드에 부딪히면 플레이어의 체력 값이 감소해야 합니다.
문제 해결: 플레이어가 계속 빨간색으로 생성되거나 생성됩니다!
게임을 실행할 때 플레이어가 빨간색으로 스폰되거나 손상되면 빨간색으로 유지되는 것을 발견했다면 애니메이션을 재설정하고 플레이어의 ready() 함수에 원래 변조 값을 할당하기만 하면 됩니다. 이렇게 하면 메인 씬에 들어갈 때 스프라이트 색상으로 색상이 설정됩니다.
### Player.gd
# older code
func _ready():
#initializes the health_updated signal to update the health and max_health values.
health_updated.emit(health, max_health)
#initializes the health_updated signal to update the stamina and max_stamina values.
stamina_updated.emit(stamina, max_stamina)
#initializes the pickups signal to update their values
ammo_pickups_updated.emit(ammo_pickup)
health_pickups_updated.emit(health_pickup)
stamina_pickups_updated.emit(stamina_pickup)
#reset modulate value so the player doesn't stay red
$AnimatedSprite2D.modulate.r = 1
$AnimatedSprite2D.modulate.g = 1
$AnimatedSprite2D.modulate.b = 1
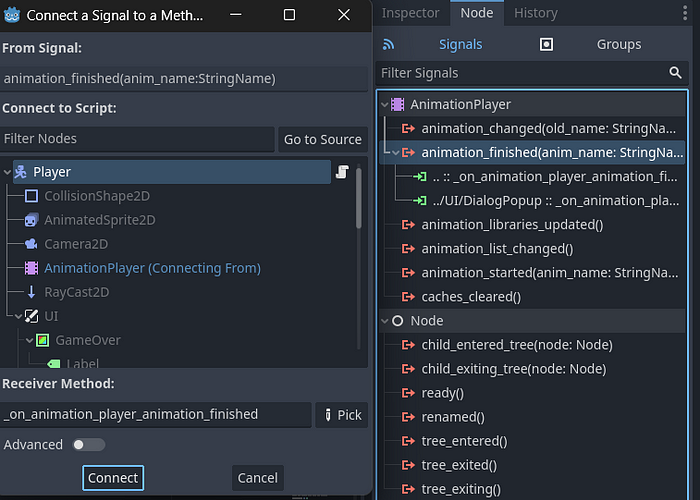
$AnimatedSprite2D.modulate.a = 1또한 애니메이션 플레이어의 animation_finished() 신호를 메인 스크립트에 연결하고 거기에서 값을 재설정하여 애니메이션이 완료되는 동안 복도에서 멈춘 경우에도 변조를 재설정해야 합니다.
### Player.gd

#older code

#resets modulate value
func _on_animation_player_animation_finished(anim_name):
    $AnimatedSprite2D.modulate.r = 1
    $AnimatedSprite2D.modulate.g = 1
    $AnimatedSprite2D.modulate.b = 1
    $AnimatedSprite2D.modulate.a = 1
축하합니다, 이제 플레이어를 쏠 수 있는 적이 생겼습니다! 다음으로는 플레이어에게 죽을 수 있는 능력을 부여하고 게임 오버 시스템을 구현할 예정입니다. 프로젝트를 저장하는 것을 잊지 말고 다음 부분에서 뵙겠습니다.
튜토리얼 릴리스
다른 부분에 대한 링크
튜토리얼 시리즈에는 23개의 챕터가 있습니다. 나는 앞으로 몇 주 동안 섹션별 일일 부분의 모든 챕터를 공개할 것입니다.
이 시리즈의 23개 파트 모두에 대한 튜토리얼 링크의 업데이트된 목록은 여기에서 찾을 수 있습니다.
'프로그래밍 > 게임 개발' 카테고리의 다른 글
| 프로그래밍 「 게임 개발 편」스케이트보드 컨트롤러 — 제스처 인식 (0) | 2023.07.04 |
|---|---|
| 프로그래밍 「 게임 개발 편」Unity의 베이킹 방법 (0) | 2023.07.04 |
| 프로그래밍 「 게임 개발 편」Unity에서 씬 로드 | Unity 개발자 (0) | 2023.07.04 |
| 프로그래밍 「 게임 개발 편」2D 플랫포머: 게임에서 스프라이트를 뒤집는 방법 (0) | 2023.07.04 |
| 프로그래밍 「 게임 개발 편」Unity에서 레벨 디자인 마무리 (0) | 2023.07.04 |


